You’ve just installed and activated the WordPress Contact Form 7 plugin and set up a form for your website. But as you’re excited to go live with your form, you bump into this error: “Failed to send your message. Please try later or contact the administrator by another method”.
You try to fix a few things but the error message is still there. So what should you do?
Let us help you! In this article, we’ll show you how to solve this error in minutes so you can quickly get your contact form up and running. Let’s start by looking at the root cause of this issue.
What causes “Failed to send your message. Please try later or contact the administrator by another method” error?
In short, incorrect configuration! You’ll receive this error message when your CF7 forms aren’t configured correctly.
Setting up a contact form with Contact Form 7 on your website is quite straightforward. However, you may accidentally configure the settings incorrectly. You should fill out the setup form correctly for each form you’re creating on your website in order for it to work perfectly.
Some common mistakes to look out for:
- Typos
- Incorrect email addresses added to the “To” and “From” fields
- Not mentioning correct inputs in the “Message body”

How to fix “Failed to send your message” error
To fix the error, all you need to do is revisit your CF7 form settings and ensure that each field has the correct information. Here’s a step-by-step process:
Step 1. Log in to your Administration panel, and navigate to the Pages tab. Go to the page where the contact form is located and copy the contact form shortcode.
Step 2. Click the Contact tab on your WordPress Dashboard. You’ll see a list of forms where you can find the contact form causing errors by referring to the corresponding shortcode. If you don’t have a lot of forms, you don’t need to go through Step 1 as you can easily identify the form with errors.

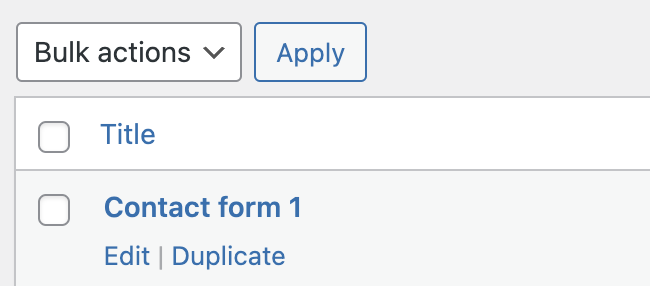
Step 3. Hover over the CF7 form and you’ll see two options: Edit and Duplicate. Click edit.
Step 4. You’ll now see a new settings window with four different tabs: Form, Mail, Messages, and Additional Settings. Click the Mail tab. This is where you can double check if every field has the correct information.
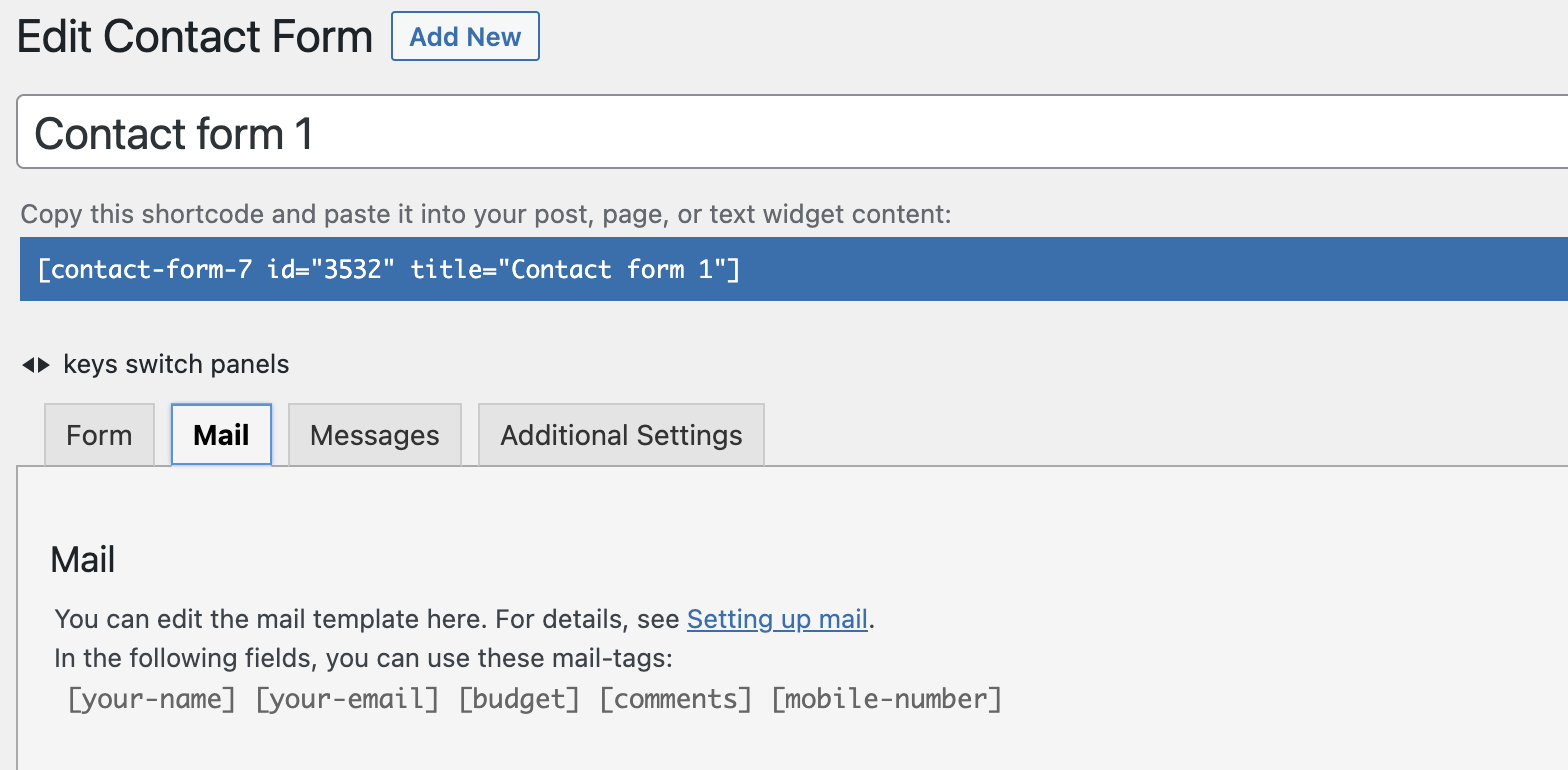
Looks confusing? Don’t worry! Let us walk you through the process!

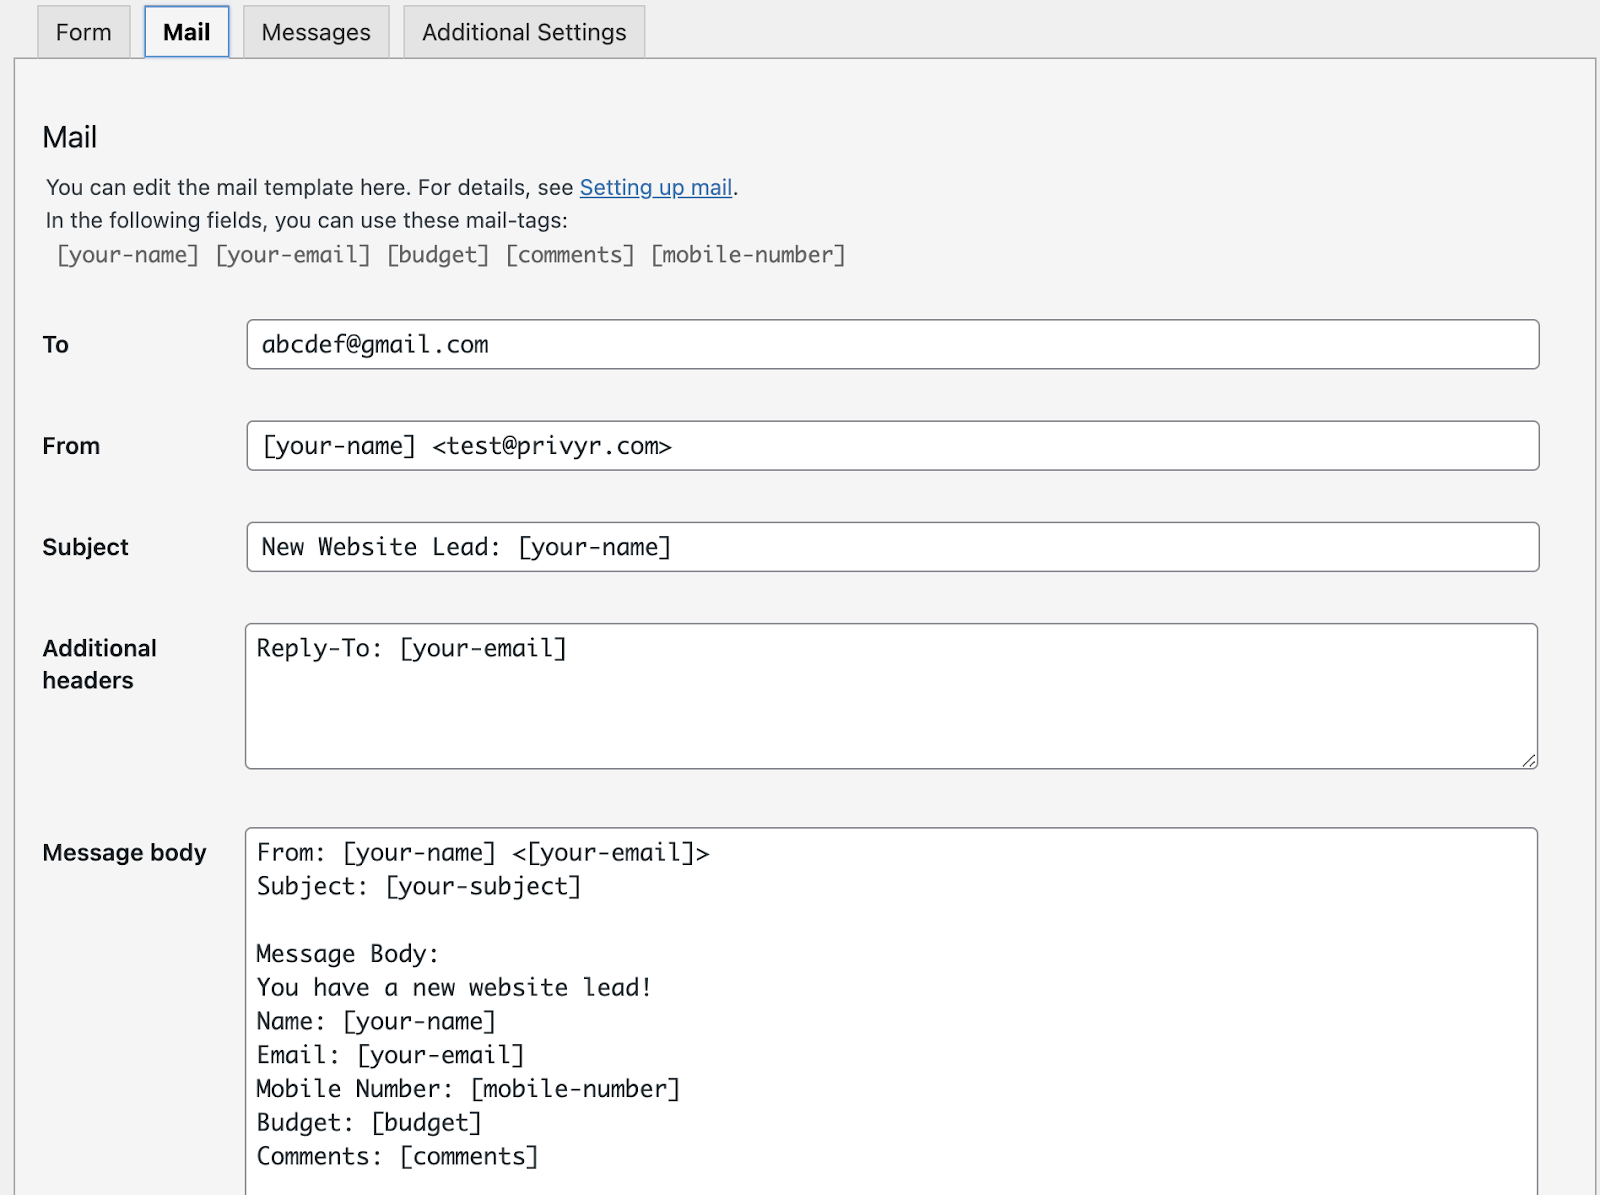
Correct configuration means inputting the right information in each field. Here’s what you need to check for in each field:
- To: Enter the email address you want to receive the notifications with. Double check the spelling to avoid typos.
- From: Enter the email address that the notifications should be sent from. There’s a default address in this field. However, replacing the default email address with the email you have access to is recommended.
- Subject: Add the subject line of the notification email here.
- Additional Headers: Add alternative email addresses, such as the “cc”, “bcc” and “reply to” options.
- Message body: Input user variables here. Entering correct information here ensures you get the full details of what your contact forms are capturing. If the field is empty, copy one of the fields from the Forms tab. The field should at least include From, Subject, and Message Body. You can add other variables if you wish to. However, keep in mind that you should wrap your codes with square brackets or it may cause errors.
Step 5. Click Save.
This should solve your error.
If you have multiple forms, you can repeat the steps above and make changes as needed.
Hope this helped you solve your issue.


